“Discord Houdini Tracker Bot” is a tool I have wanted to create while interning at SideFX for a very long time. It’s always a pain when I am running caches and rendering on the computer in the office, but I can’t see the progress or get the result for the meeting on the second day. Therefore, I created this Discord bot to help me track the progress of the TOPNET that is running, and send me the final render result when it finishes.
The project was inspired by this post created by Juanjo Martínez.
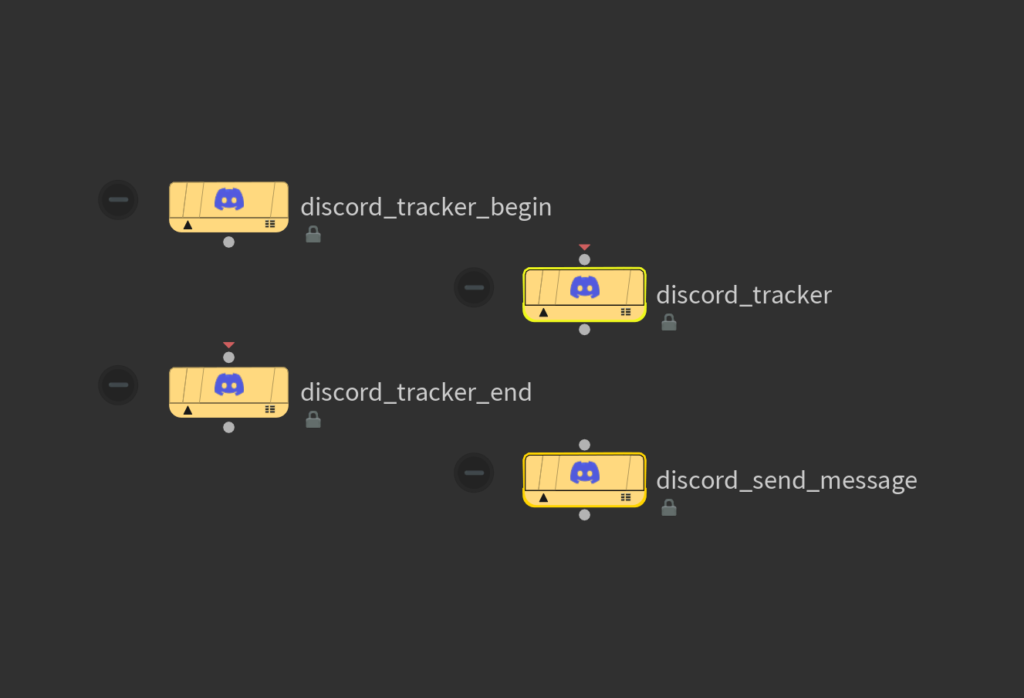
You can scroll down after the setup guide to see how the tool works! I created 4 Python HDAs including Discord Tracker Begin, Discord Tracker End, Discord Tracker, and Discord Send Message. They work together to update the progress of the TOPNET with the Discord bot. Additionally, there’s also a shelftool script for quicker setup. The HDAs use the Python Script Topnode to run the Python scripts, and I use the Python Requests module to post and patch messages.
You can try out the Discord tracker by using the download button below to download the HDA! Hope you like it.
UPDATE: I just finished an additional quick setup shelf tool for the tool set! Scroll down to see how it works and how to set the tool up!
Discord Bot Setup
To set up the tracker, you need to create your Discord bot first. You can follow this Discord document to set up the bot at the Discord Developer Portal. After you create the Discord Bot, you have to invite the bot to your server and either save your bot token and user ID into the Houdini environment file or manually paste them into the parameters in the HDAs.
Example:
BOT_TOKEN = YourBotToken12345
USER_ID = YourUserID67890
Shelf Tool Setup
The shelf tool is a Python script that will add the Discrod Houdini Tracker nodes into your node tree for you, so you don’t have to add them in manually.
The user just need to select the nodes they want to track in the topnet and click on the shelf tool. It will pop up a window to ask if you already set up the environment variable. If the user decided to enter Manually, it another window will appear asking you for the Bot token and User ID. It will enter the information in the paramters in the “Discord Tracker Begin” node and reference the paramters in other tracker nodes for you.


Here’s how to set it up after you downloaded the shelf tool script!
- Create a shelf new shelf tool tab or use any of the existing ones
- Right-click on any space on the shelf and select “new tool…”
- Change the name and label to what you want to call the tool. You can also add in the Discord Icon provided if you want.
- Go to the script tab and copy and paste in the python scripts. Make sure the script language at the bottom is set to Python.
- Click on “Accept” and you are done!
For more information about how shelf tools work in Houdini, you can check out this Houdini shelf tool tutorial by Indie Pixel.
QUICK TIPS
- You can find your User ID by enabling developer mode in Discord Advance Settings and then right-clicking on your name from a message you sent to copy your user ID.
- The houdini.env file is located in C:\Users\user\Documents\Houdini##\houdini.env for Windows.
- The HDAs need to be put in a folder called “otls” in the same location as the houdini.env file.
- The shelf tool will only set up the discord settings for you when you chose to enter manually if there isn’t a “Discord Tracker Begin” node in the selected nodes’ node tree.
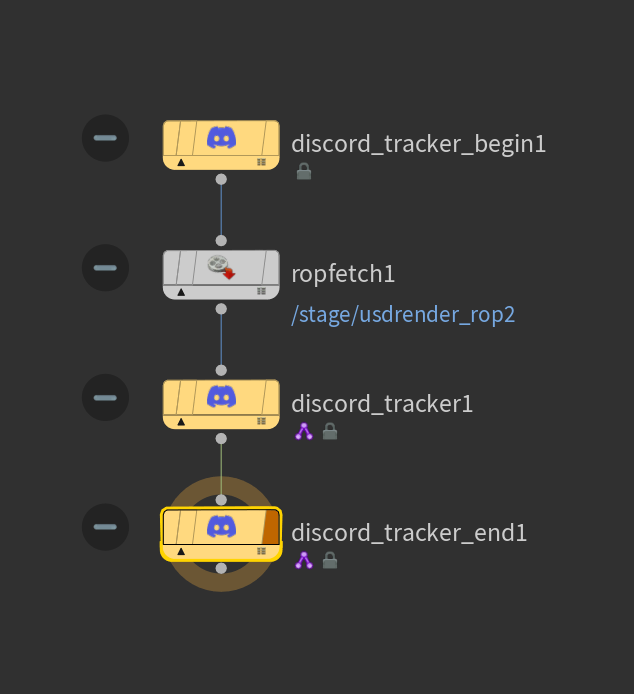
After the Discord Bot is set up, you can drop down Discord Tracker Begin and Discord Tracker End at the beginning and the end of the node tree you are running, and Discord Tracker node after the TOP node you want to track.
Here’s an example tracking message you will get from Discord when you run the TOPNET.
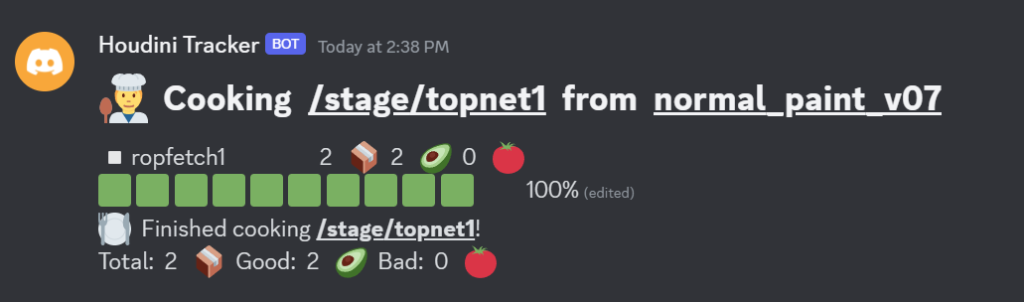
📦 : Total Work Items 🥑 : Successful 🍅 : Failed
Discord Send Message
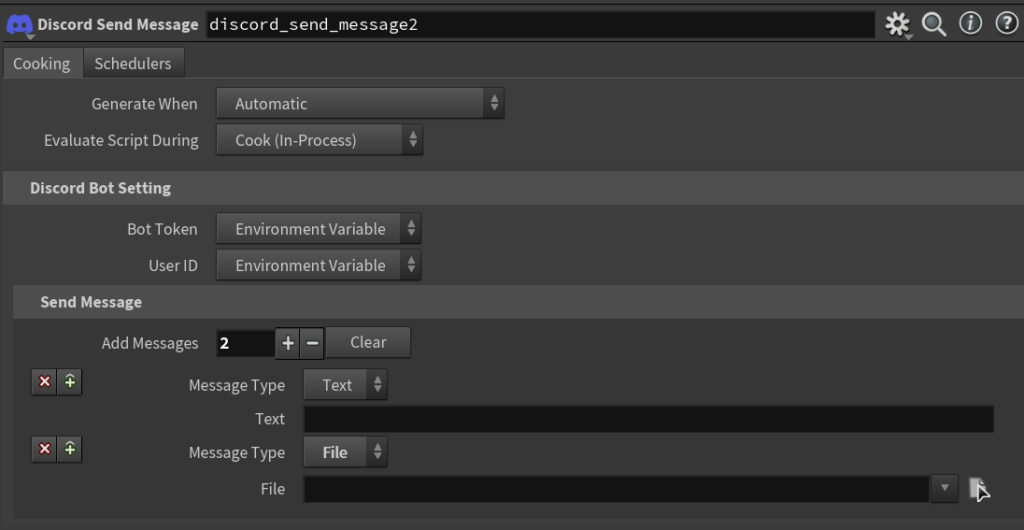
The Discord Send Message node. This node has a multi-parm that allows you to send multiple messages or files when it is evaluated. The other three Discord tracker nodes also utilize this node to send messages before or after the node network is cooked, or after each tracked work item. Users can check the check box to access the same multi-parm to add messages.
Discord Tracker Begin/ End
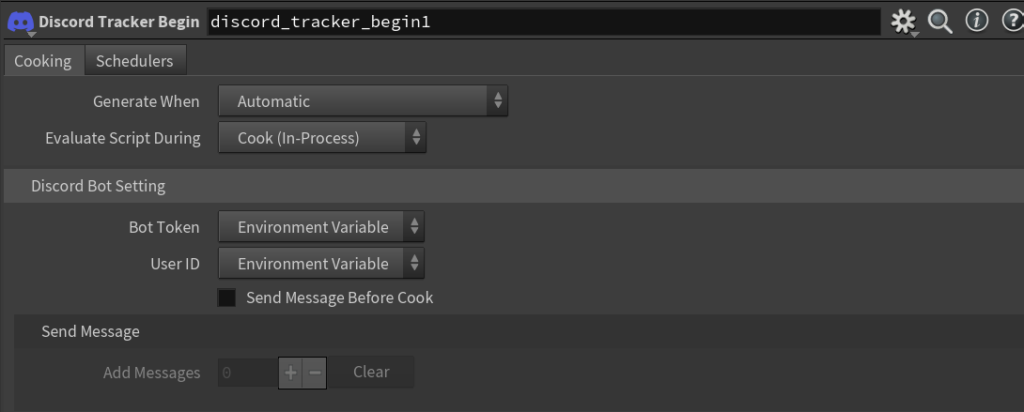
The Discord Tracker Begin node will find out what nodes are being tracked by finding the Discord Tracker nodes in the connected node tree and sending out two messages including what topnet is being run from what file, and a list of nodes that are being tracked. Note that the number of total work items will only be updated once the corresponding Discord Tracker node receives a finished work item regarding success or failure.
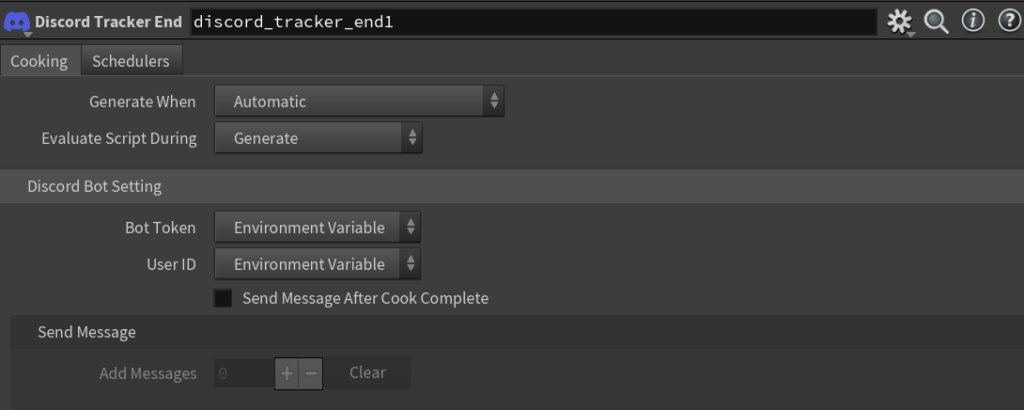
The Discord Tracker End node will gather the total amount of work items information and send out a message with the data.
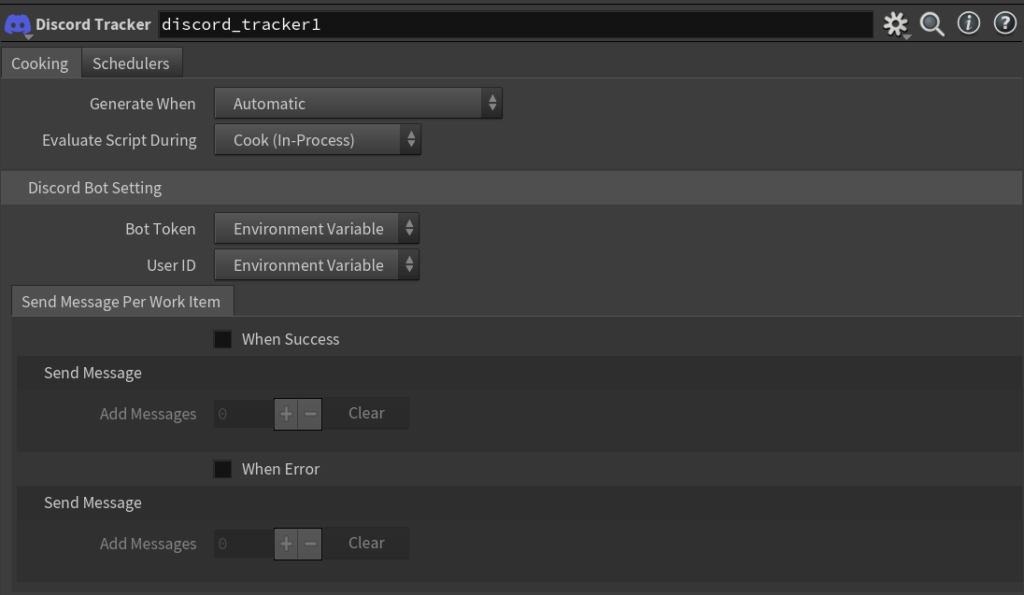
Discord Tracker
You don’t really need to change anything with the Discord Tracker node unless you are manually entering the Bot token and user ID. Discord Tracker will read attributes from the work item received, and then update the placeholder message from Discord Tracker Begin as it goes. The node uses the “Filter by State” node in order to run even when the parent work item fails, and the “Partition by Frames” node combines success and failed work items back together.
One thing to pay attention to when putting down the tracker is that work items after the tracker have to wait until all work items being tracked are done cooking. The Discord Tracker is like the “Wait for All” node without combining work items into one. Therefore, only tracking after each section of nodes where they don’t need to wait for the previous one to finish cooking will be more optimized without losing time to wait.
The three Discord Tracker nodes rely on each other for them to work because they store information such as message ID and render progress data as environment variables using Python’s os.environ, but the Discord Send Message can be used without other Discord Tracker nodes. You can just use it to send a message or a file.
Future Feature Ideas
- Quick setup shelf tool (DONE!)
- Option to send messages to a User or a Channel
- Average and total cook time
- Emoji Customizations